(WebGL) A RenderManager to handle multiple setups
After experimenting more with Three.js, and working with more complex scenes and setups, I recently felt the need of a structured manager to handle multiple scenes, cameras and render loops.
Indeed, working with more than one scene/camera/render setup can quickly become messy, juggling with many variables for each setup.
To counter this, I developped a tiny Three.js extension: THREE.Extras.RenderManager. Head past after the break to download and learn more about it.
Demo
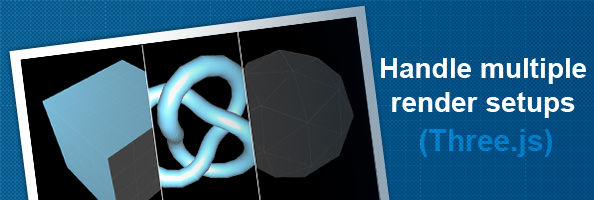
For this demo, I kept things as simple as possible. I didn't want to disrupt the RenderManager code with any fancy additions. You can switch between 3 render setups using the buttons on the right.
Be sure to check out the source code of the demo for an in-depth look.
See the THREE.Extras.RenderManager demo
Download
Download THREE.Extras.RenderManager on Github
Explanation
RenderManager is an extension that ease the handling of multiple scenes, cameras and render loops by storing render setups inside a meaningfull structure.
Initializing the RenderManager
First thing to do is setting up the RenderManager by creating a new instance of the class, and by passing a Renderer to it.
// Setup a new WebGLRenderer (same code as ever)
var renderer = new THREE.WebGLRenderer( { antialias: true } );
renderer.setSize( window.innerWidth, window.innerHeight );
container.appendChild( renderer.domElement );

// Setup the RenderManager
var renderManager = new THREE.Extras.RenderManager(renderer);
Adding a new render setup
Let's say you have a bunch of scenes, cameras and render loops, like if you have different cameras angles for a scene, or different levels in a game, you can register a new render setup by using the following code.
renderManager.add(id, scene, camera, renderMethod, objects);
This code will register a new render setup in the RenderManager.
A render setup is on object with the following data structure :
{
	id 		<String>		: render setup ID,
	scene 	<THREE.Scene>	: main scene,
	camera 	<THREE.Camera>: main camera,
	render 	<Function>	: render loop called when render setup is active (current),
	objects <Dic>			: object references accessible in the render loop via this.objects
}
Render setups are stored in the RenderManager.renders attribute.
Rendering the current setup
To render the current setup, and call its render method, simply use :
renderManager.renderCurrent();
Note that by default, the first setup registered will be defined as current.
Also, when calling renderCurrent() the render method you provided will recieve two arguments: the delta time enlapsed since the last render call, and the reference to the manager's renderer. Example:
function render(delta, renderer)
{
	this.camera.rotation.x += delta;
	renderer.render(this.camera, this.scene);
}
Switching between setups
To switch between setups, use :
renderManager.setCurrent('SetupID');
Other tips and tricks
The render method's context will be the render setup's object, so in your render loop, you can use:
function(delta, renderer)
{
	this.scene;
	this.camera;
	this.id;
	this.objects;
	renderer.render(...);
}
Use the "objects" attribute to store useful references and variables like time, geometries, materials, etc. Example:
renderManager.add('mySetup', scene, camera, function(delta, renderer)
{
	this.objects.timer += delta;
	this.objects.torus.rotation.z = Math.PI * Math.cos(this.objects.timer);
	renderer.render(this.scene, this.camera);
},
{
	timer: 0,
	torus: object
});
If you don't provide a render method, the following default render method will be used:
function(delta, renderer)
{
	renderer.render(this.scene, this.camera);
};
Last words
This extension is still in development, I may add more features as I need them. Also don't hesitate to suggest new ones in the comments or on the github page.
 XML/RSS Feed