Light baking and automatic UV unwrap with Max
Having a big mesh composed of a multitude of simple geometry shapes can be long and painful to map UVs for light baking and rendering advanced lighting into a texture can save up a lot of resources when rendering static meshes in real time.
In this tutorial, I'll show you how to automatically unwrap UVs and bake advanced and cost-heavy lighting components (Ambient Occlusion, Shadows, Caustics, Global illumination) into a lightmap texture using Max's RenderToTexture function for later use in a real time rendering pipeline.

Head past after the break to read the complete tutorial.
Prerequisites
This tutorial assumes you're familiar with the basic tools available in Max, including how to setup your scene with lights and skydomes, as well as setting up Global Illumination and Ambient Occlusion rendering.
See this tutorial for a quick catch-up on indirect illumination with Mental Ray.
Setting up your mesh

First of all, make sure your mesh is in "Editable Poly" mode, then attach any related geometry so that your mesh lies within a single object. This step is crucial for automatic UV mapping. If you already have some UV mapping done manually, skip this step.
Defining a material
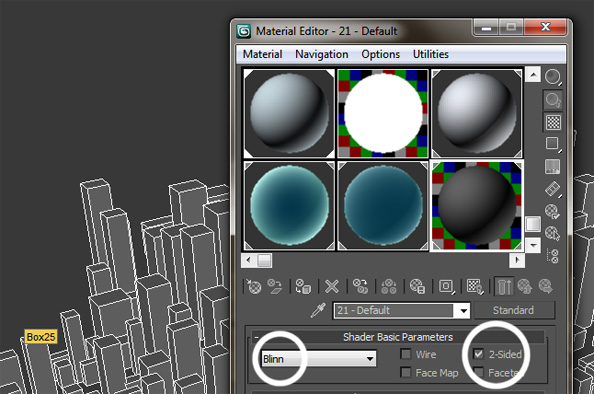
Max's RenderToTexture function requires you to use a Standard Material. I'm suggesting a simple Blinn or Phong material. Also, note that checking "2-sided" is important if you're going to bake Ambient Occlusion on a mesh with overlapping geometry.
Opening the RenderToTexture window
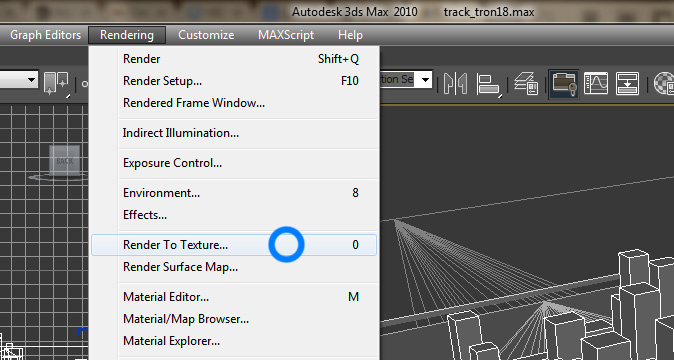
Then open the RenderToTexture setup window unsing the corresponding entry in the "Rendering" top menu.
Setting up textures' output directory
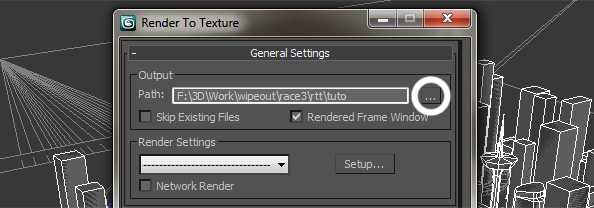
First step is to select a directory where your baked textures will be output by clicking the little "..." browse icon at the top.
Setting up objects to bake
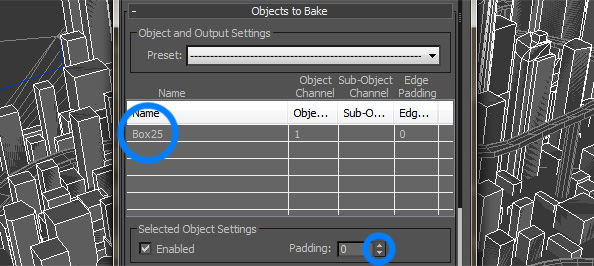
Make sure you're object/mesh is selected in Max, so that it should appear in the Objects table int the RTT window. Not that you can render and unwrap multiple objects at one.
Make sure padding is set to 0, otherwise some space will be left around the clusters, eating up valuable texture space/resolution.
Setting automatic UV unwrapping
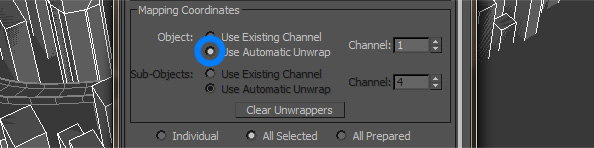
Skip this step when working with manually mapped UVs.
Adding textures elements to render
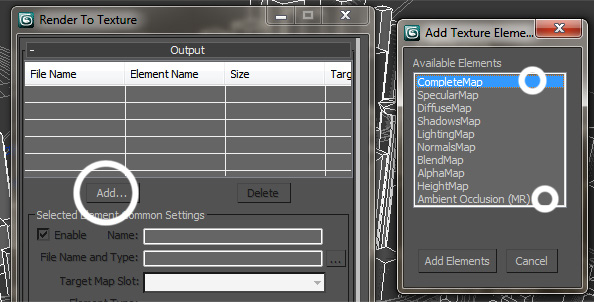
Next step is to select which kind of lighting you want to bake inside a texture.
The most common ones being Complete, Shadows, Lighting and Ambient Occlusion maps. Note that CompleteMap is the most cost-efficient technique since it's packing all shadows, AO and lighting into a single texture, usable directly inside a diffuse component. For more flexibility in your rendering shader, I'd suggest splitting AO, color and shadows into separate textures if you can afford the computationnal and memory costs.
Configuring elements
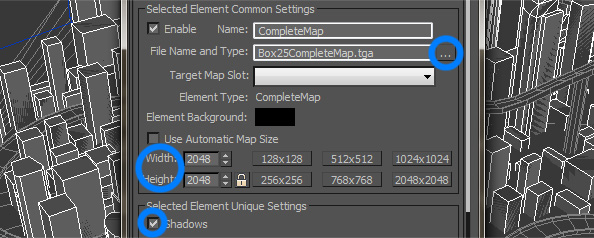
Don't forget to select your desired texture size and parameters for each of your texture elements.
Configuring automatic unwrapping
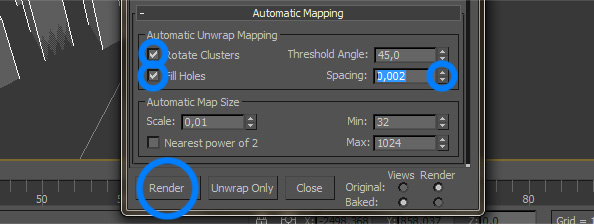
When using automatic UV unwrapping, make sure "Rotate Clusters" and "Fill Holes" are checked. This will optimize your mapping, saving up precious UV space.
After that, take some time to properly set up the unwrap spacing. This step is really important, because a small spacing will result in texture bleeding upon rendering, while a spacing too big will just waste UV space, decreasing details and quality. I suggest trying with values between 0.002 and 0.01.
Once your done, simply hit the "Render" button at the bottom of the RTT dialog. If you want to quickly test out your automatic unwrapping parameters, you can hit "Unwrap Only" to apply the unwrapping algorithm to your mesh and see how it behaves without rendering all your textures, saving up time.
Rendering
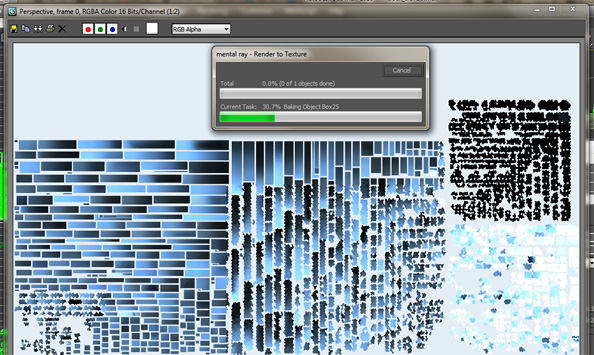
This step can take up a lot of time depending on your quality settings, mesh density and scene complexity.
If your final render looks low-quality-ish, make sure your GI, FG and other indirect illumination parameters are properly configured in Max's renderer setup window.
Verifying UV mapping
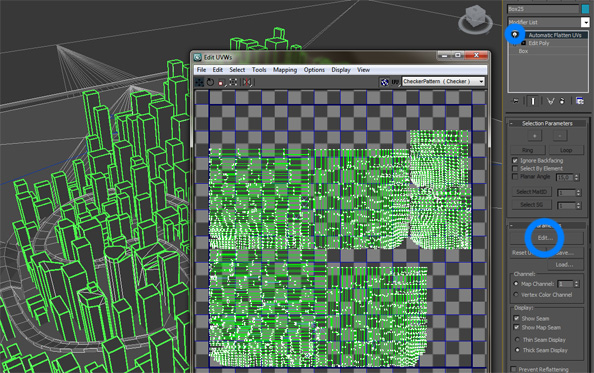
Once you're done, you can verify the automatic UV maping of your mesh in the modifier list. Hit the "Edit" buttong to pop up the UVW window.
Last notes
Don't forget to export your mesh with the new UV mapping.
You can test your baked textures directly inside Max by simply using the textures as diffuse material map.
Three.js offers support for lightmaps and Ambient Occlusion maps through the use of THREE.MeshPhongMaterial.
 XML/RSS Feed